Friday 29 November 2013

The History of DJ Equipment

The History of DJ Equipment


A DJ or Disc Jockey is someone who plays records to an audience on the radio or at events. Some DJ’s have developed on stage personas and they will talk in-between songs to either hype up the next track or they would hype up the audience.

DJ Pioneers
The very first DJ was Ray Newby in 1909 at the age of 16. He would play records on a phonograph, introduce the songs using a microphone and use a spark transmitter to send the music out.
Picture of Ray Newby


In this video segment from "I've got a secret" Ray Newby describes being the worlds first Disc Jockey

And in 1927 Christopher stone became the first radio announcer and programmer in United Kingdom on the BBC radio station


DJ Equipment
Spark Transmitter – “an early radio transmitter using a discharge across a spark gap as the source of its power” Used to send the radio broadcast around.
(Definition from wordnetweb.princeton.edu/perl/webwn)

Microphone – “An instrument that converts sound waves into an electric current, usually fed into an amplifier, a recorder, or a broadcast transmitter.” Ray Newby would use the microphone to introduce the songs and inform people of news.

Phonograph – A machine that reproduces sound by means of a stylus in contact with a grooved rotating disk.  **BASIC FEATURES**

Pros
  • Messages can be sent and received quicker than normal
  • Easy & simple equipment
Cons
  • Limited Range
  • Weather conditions would interrupt broadcasts
  • Vocals not clear
1930’s to 1950’s

1935 – Walter Winchell made up the term disc jockey, (he came up with this as disc referred to the disc records and jockey refers to the operator of machines).

1941 – The term disc jockey was printed in Variety, Which was a magazine that was for the film industry

1943 - Jimmy Savile launched the world's first DJ dance party by playing jazz he claims to have become the first DJ to use twin turntables for continuous play. This means that the music would continue without breaks as there would be two vinyl’s and one could play from the other and there would be minimal talking whilst changing songs. This was important for the development of dj'ing because it meant that people could continue dancing without stopping meaning that it would be more fun and could mean that mixes would be created.

1950 - American radio DJs would appear live at parties. They would usually play 45-rpm records, (Revolutions per minute, this is a measurement of rotation). This is where the definition of an entertainer came into place as the DJ would have to keep everyone entertained.

1940s Microphone

1940s Turntable


Jimmy Savile in 1947
DJ Equipment

Turntable - "Machine with a rotating center used by DJ's to play, scratch, and mix music." Jimmy Savile would place records on the turntable and play song after song

(http://www.urbandictionary.com/define.php?term=turntable)

Microphone - “An instrument that converts sound waves into an electric current, usually fed into an amplifier, a recorder, or a broadcast transmitter.” Jimmy Savile would speak into a microphone to announce upcoming songs and important messages

(Definition from http://www.thefreedictionary.com/microphone)

Turntable 


Pros

  • Portable system 
  • Allowed tempo to be sped up or slowed down
  • Best sound quality of this era
Cons
  • Fragile 
  • Hard to control without practice 
  • cue points are found manually usually with tape markers

Microphone 

Pros 

  • Allows sound to be amplified in real time
  • clear way of projecting voice 
Cons
  • Microphones have a maximum wire length 
  • possibly a chance of feedback if too close to speakers

1960s to 1980s
CMA-10-2DL
Mid 60's: the CMA-10-2DL was released
This was important as it allowed DJ's to mix songs whilst playing a set
SL-1200
1974: The first SL-1200 turntable was released and 30 years is still a standard part of equipment for DJ'ing
                                                           

1969 and 1975: Specialised equipment was created and this led to more DJ'ing techniques such as turntablisim and scratching 

1975: Grand Wizard Theodore created scratching technique by accident. And after people found about it they put their own twist on it and this is the result


Turntablisim - Turntablism is the art of manipulating sounds and creating music using turntables and a DJ mixer. 

DJ Techniques
Scratching - This is done by literally scratching the record back and forth to create an effect also by quickly cutting between two vinyls using the cross fader, On older versions of turntables the cross fader was a thin piece of material but now it is a stronger piece of material as the purpose for it has changed.

Beat Matching - This is done by matching tempos from one record to another record so that they are in sync. When this style was first invented it was harder to do as technology had 

The Birth of the digital age
Compact disks started this off as it was a way of cramming loads of information into a single place. Recordable disks can hold up to 60 minutes of songs and these can be split up to singular values, meaning that one song can be played and then a track 5 songs down rather then having to get another vinyl out. 

1992 - MPEG Produced the MPEG-1 and later on the MPEG- layer 3 also known as MP3, which is a digital form of a song which is compressed to be as small as possible 

DJ Equipment 
Compact Disk - An optical disk used to store digital data. This is put into a CD player and then this rotate and scan the information and then is processed and converted into sound using a DAC

Pros
    • Allows more than one song per CD
    • Small enough to carry many more than just a couple of vinyls
    • More affordable than vinyls
    • Stronger than vinyls
    Cons
    • Scratches easy
    • Can be misplaced if not labelled properly

    From Analog to Digital 
    Late 1990's: DJ and VJ software programs were developed
    1998: First MP3 digital audio player was released
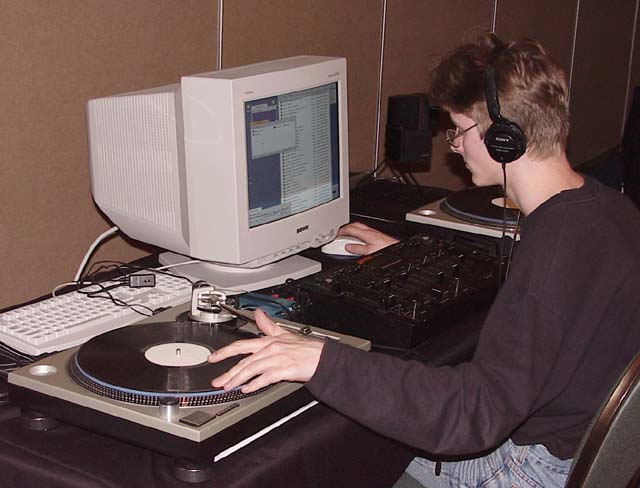
     First digital DJ system "Final Scratch"
                         
    1999: First media sharing site Napster was released
    2000 - 2013: Technology has developed further

    DJ Setup (Equipment):

    Final Scratch- Is a DJ software that allows manipulation and playbacks what has been inputted.
    By placing the vinyl on the turntable the signals are interpreted  by a computer which is connected via a "Scratch Amp".

    Pros
    • Allows you to play any track that you have on your hard drive 
    • Prevents needle skips

    Cons
    • Not alot of control to mix and EQ tracks, that's all done on the computer so no freedom of movement


    Technology Comparisons 
    Traktor software and DJ controller 

    DJ Equipment


    Tracktor software and DJ controller
    Pros 
    • Loops that can instantly be tracked with a press of a button
    • Beat detection grid that automatically detects where the beat is so that 'beat-matching' is easier
    • Sync lock to keep a specific track matched to another tracks tempo, even if song is changed
    • MIDI Controller acts like a turntable with a mixer on it so it can be carried around easier than two pieces of equipment
    •  Offers a chance to EQ the Lows, Mids and highs of a track individually 
    • Cue points stay on a track digitally so if that mp3 is put into another Trakor it is saved
    • Sound effects such as sirens can be used
    • Filters can be used, So a DJ can remove the bass of a song and then bring it back up for an effect.
    Cons
    • Price of certain MIDI controllers are expensive but if DJ'ing is something you are interested in the this is something you should definitely invest in this as it is the best it can get.

    Conclusion

    Analog set-up


    Pros:
    • Better sound quality
    • Much cheaper than a digital DJ Setup
    • Authentic crackling noise
    Cons:
    • Less effects 
    • Fragile and heavy equipment
    • Cue points and syncing must be done manually
    • Needle skips may be frequent 

    Compared to a digital set up the Analog set up has a more of an authentic feel to it due to the crackling and the fact that most of the sounds is produced by hands and not a electronic cue point. But the analog set up lacks the freedom that the digital set up offers meaning that there is less choice for effects and cue points must be done manually which is almost impossible if you are trying to be fast and have fluency to your set also another thing that the analog set up is lacking is the versatility as to change song you must change vinyl which is time consuming

    . Digital Setup

    Pros:
    • Allows DJ's to use any song on the internet
    • Allows beat matching and syncing to be done in a click of a button 
    • Cue points are imprinted on the mp3
    • Has a wide range of effects and loops 
    Cons:
    • MP3 sound quality can't ever compare to vinyl
    • The price for equipment is high and is forever rising as new technology is released
    Compared to an analog set-up digital adds more control and gives the DJ more features to play around with and to create a unique sound. With the ability to EQ sounds and filter sounds and sound effects. Also music is stored on the laptop/computer and is easily accessed and can be dragged and dropped into the track. Also DJ techniques are easier on the digital set up as you can beat match with a click of a button.

    Bibliography

    Scratch - Film
    Phil Robinson - Teacher 

    Tuesday 26 November 2013

    Hear and Identify

    Hear and Identify

    Finding faults within the track called ‘Bad version’ comparing it to the ‘goodish version’, and giving feedback on ways to improve it and prevent this from happening in the future. I will also be commenting critically on whether the mistakes would affect the tracks success or not

    Faults

    • In the recording there is a Cough at 0:03.This can be fixed by cropping it out whilst using logic by slicing the area of the audio file you want gone and deleting it, this will remove the cough. Another way you can remove this is to re-record the recording again and this time restrain from coughing as the artist would be warned that the recording is starting because of the 3 metronome beeps. The cough will affect the overall success of the track as it seems unprofessional and will not be taken seriously as the artist did not seem that bothered about a mistake at the bottom.


    • In the ‘bad version’ the Bass Velocity levels are lower than in the ‘goodish version’. The bass in the bad version was being overpowered by the other instruments and was not coming through as heavy as it should have. This can be fixed by opening up Piano roll on logic by pressing ‘P’ and then pressing ‘Esc’ to bring up the toolbox, Once the toolbox is opened you selecting the velocity tool and drag it up individually or you can go to ‘transform’ and select ‘fixed velocity’ to make all the MIDI data in the pattern a certain velocity. This would affect the overall success of the track because the instrumental is not mixed properly so when played on professional sound systems it will lack substance and all be distorted. This can be fixed by mixing and mastering the recording properly.


    • In the ‘bad version’ there is Popping at 0:19. This can be fixed by buying a pop shield or by lowering the microphones sensitivity to the vocals. This will make the recording clearer and remove other sounds as well as the popping. The popping of the vocals makes it seem unprofessional as the proper equipment is not used and therefore it is hard to listen and the track would not be deemed successful.


    • In the ‘bad version’ there is an Out of rhythm segment at 0:22. This can be fixed by re-recording the vocals. Compared to the ‘goodish version’ the vocal is out of rhythm and sounds dodgy it just doesn't fit right and whenever that error is playing it is noticeable and makes the whole production seem unprofessional.


    • In the ‘bad version’ the Panning is done wrong and the song comes through my predominantly on the right side this can be fixed by changing the mastering output panning to ‘0’ this will mean that the song will be distributed equally from both headphone sides. This will make the track unsuccessful as it would not get any attention as proper attention was not paid to the final product and it lacks professionalism.


    • In the ‘bad version’ the Ending is not cut properly, This means that the vocal just suddenly cuts off meaning that no fade out was created and this can result in clipping if a speaker goes from sound to nothing. To prevent this fade ins and fade outs should be used at every new vocal file to make sure that the whole piece comes together and the final product is of a good standard.


    • In the ‘bad version’ there is a Static noise at 0:44 this could have been caused by wires being removed while the file is being bounced to a wav. Or mp3. This would result in a surge being passed through the interface affecting the output sound. Or it could be caused by a mobile phone passing signals by the microphone and being picked up this can be fixed by removing the audio by slicing it and deleting it. This was not an obvious mistake it took me several listens to find the mistake, but if it was listening to on a professional system the mistake would be very obvious so it would not be professional to leave the static sound.


    • In the ‘bad version’ the track is Unmixed (muffled voice, Vocals not standing out) this can be fixed by mixing down the track and EQing the vocals so that they stand out and the whole track comes together this is because without it the track sounds unprofessional. With the track being cleared it will be easier for the listener and make it more of a smoother listen rather than having to distinguish what each word is. So for the track to be considered successful the track would have to be mixed down properly.  


    • In the ‘bad version’ the Breathing between vocals is not cut out this could be successful if it was an acoustic version or something live but because this is meant to be a studio recorded track it would have to be removed. This could be fixed by removing the breathing individually by selecting the area of the audio file where the breathing is present and deleting it. It is a time consuming bit of work but for a studio sound this would have to be done to sound as professional as possible. The breathing wouldn't affect the success of the track because it is a minor mistake and shouldn't affect the overall quality of it.


    • In the ‘bad version’ the backing vocals are too high and are not backing vocals there are probably the same decibels as the main vocals. This can be fixed by turning down the overall volume of the track. As the backing vocals do not sound like backing vocals it sounds unprofessional and this mistake would affect the overall success of the track because a successful track would have a set volume for backing vocals and main vocals.


    • In the ‘bad version’ the instrumental ended early and abruptly which was a shock to listen to as the instrumental carries on in most popular and successful songs. Compared to the ‘goodish version’ it ends early and possibly before the vocals end, this can be fixed by added on more of the instrumental in logic by dragging the MIDI data over or if it is not a MIDI Data then it can be played again until it fits nicely over the vocals and plays for a short time after the vocals actually finish.


    • In the ‘bad version’ there is background noise at 0:02 this is because the audio file has not been cut to the start of the singing. This will affect the success of the track because this is a mistake that makes the whole product sound unprofessional. The background noise can be removed by slicing and removing the point at which the noise is heard and then the noise will not be heard and the track will seem professional.


    Monday 18 November 2013

    1st Recording

    1st Recording

    Entry 1 – 12/11/2013

    Group: Shaq, Reg, Ron

    Instruments: Acoustic Drums, Electric Drum Kit, Electric Piano

    Microphones used: Audix D6, Shure SM57, SE Titan, Shure SM58

    Set Up

    We started the 1 hour session by deciding what instruments we would use as we would then be able to set the microphones up the specific instrument in places where the microphone would benefit and the recording would be perfect. First I set up the Audix D6 to Kick Drum on the Acoustic Drum set, as it picks up the kick better than any other microphone and we put this on a small stand with about 1 foot of distance between the microphone and the kick. We then plugged an XLR Cable into this and then connected it to the floor board which is connected to the interface which feeds into Pro Tool. We put the XLR Cable into ‘Input 1’ as this would make it easier to set up logic and wouldn’t be confusing with more instruments being added, also it will make it easier to set up Logic and record. The Second microphone we used was the Shure SM57 and this was placed on a normal stand and we put this stand to its height limit to bend it over so that the mic was placed in the middle of the drum kit because this mic is good for picking up high frequency sounds so the hi-hats would be picked up very well as well as the rest of the drum kit. This was again connected to the Floorboard with an XLR cable this was plugged into ‘Input 2’.

    Recording

    To record we opened up Logic and we created three tracks and labelled them with the name of the instrument that they were recording and changed the input of the track individually by changing the settings. We opened up these settings by selecting the I/O Option on the selected track, And changed the input to what microphone was recording that particular instrument, We then changed the output to something further away from the input as it would be confusing so for track one the Audix we made the settings “Input 1 Output 5”.  Before we recorded the engineer asked the performers to play their instruments so that the Amplitude could be corrected and the gain could be turned up and down so that it is all level and not one sound is overpowering the next. Once all the tracks were track enabled by pressing the record button we then recorded the live sounds. We recorded 3 microphones at one time

    Problems

    No Audio was coming from channel 3, everything was set up properly we were listening to the right thing on the interface and the problem was that someone before us had removed a piece of wiring at the back of channel 3 and had plugged it into channel 4. We fixed this by placing the wire back into channel 3.


    In the Control room for studio 2 the engineer could hear the performers but could not be heard this was because of a faulty headphone connection but this was corrected by replacing the headphones.

    Tuesday 12 November 2013

    SMART Targets

    SMART Targets

    I would like to improve my Piano skills by learning 3 piano scales by Christmas, This will help me with the production side of the course also with music theory. I will measure this when it comes to Christmas by playing the scales that I know. I have set it to 3 scales because i would like to progress and not give myself too much to learn at one time.. Also if i achieve this i can then set other goals that are achievable and this will give me momentum.